How I Am Making Yogurt Right Now: The Cooler Method

This post was originally published in November of 2010.
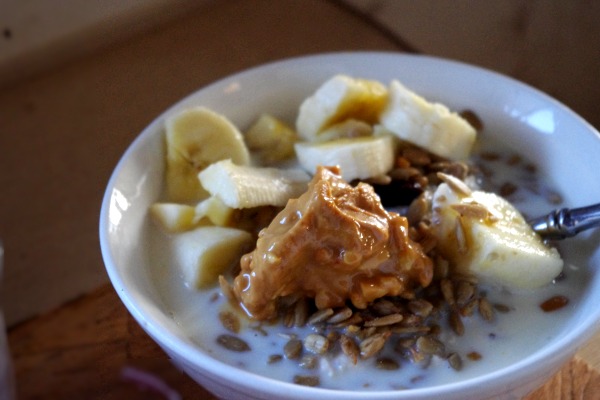
For some reason I feel better when we have yogurt in the house. Probably both physically and mentally. I use it as a quick breakfast with fruit and nuts or a quick lunch for that matter. I eat a bowl of it on most days when we have it in the house, but making it in my crock pot was becoming hit or miss.
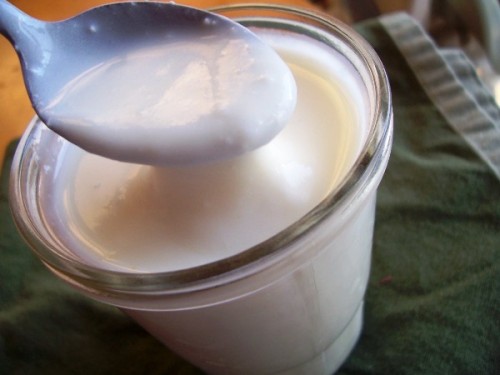
Have you tried the crock pot yogurt? It is one of my most visited and commented-on posts here. It is super easy and very hands-off… when it works. When it doesn’t it is disappointing. For some reason my crock pot has not been as reliable the past six months and I have switched to a more even incubation method for the yogurt. Both my husband and I agree: this is the thickest, creamiest yogurt we’ve had.

I have desperately tried to make raw yogurt with no success. It is not that it isn’t possible, I have talked to many women who have done well with the starters from Cultures for Health. It’s just that, well, I always seem to mess it up or forget about it entirely and kill the poor, defenseless starter.
The basic science of yogurt: Start with a store-bought yogurt containing live cultures. Heat your milk up to 180 degrees to kill off any bacteria that would compete with the new cultures. Cool it down to 110-115, the temperature at which the cultures will feast on the lactose and create tangy, cultured yogurt. Keep it at around 110 for at least 12 hours to allow this process to happen.
Homemade Yogurt In The Cooler
Equipment
- Dutch oven over large pot
- Thermometer (I have this one)
- Medium-sized cooler
- Four quart canning jars + 1 pint jar
- Ladle
- Food funnel
Ingredients
- 1 gallon grass-fed milk
- 8 tablespoons (1/2 cup) good plain yogurt starter

Directions
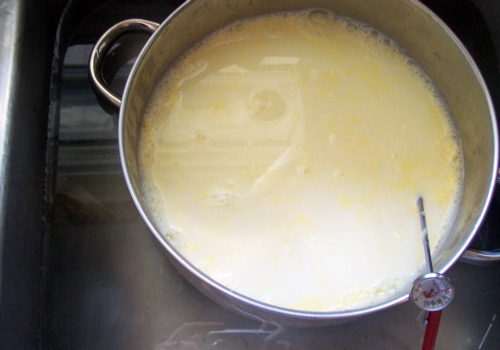
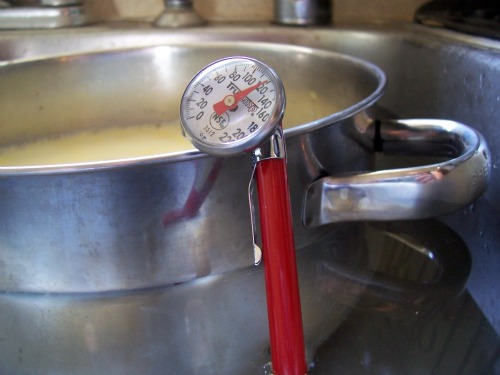
- Heat the milk: Pour one gallon of milk into a (clean) dutch oven. Heat it over medium heat, stirring a few times, until it reaches 180 degrees.
- Cool the milk: Remove the pot from the heat and allow it to cool back down to about 115 degrees. You can do this by simply letting the milk sit in the pot until it cools down, about an hour. Or if you’re in a hurry, fill your sink up with cool water and place the pot of warm milk in the water. Watch the thermometer closely because the temperature drops rapidly with this method.
- Prepare your culture: Use about 2 tablespoons live yogurt for every quart of milk. Mix the yogurt with a little bit of the 115 degree milk to make it viscous and bring it up to temperature.
- Prepare your incubator: I use a medium sized cooler for this. Pour in hot water (about 120 degrees straight from my tap), until the water level is high enough to go about half way up the quart jar (about 4-5 inches). Close the lid and let it wait for your yogurt.
- Prepare the yogurt: Ladle 115 degree milk into quart jars, leaving 1.5 – 2 inches of head space. Divvy up the culture between the quarts and pint, mix well with a clean fork, and seal jars tightly.
- Incubate: Place jars into cooler with water. Cover with a blanket or towel for insulation and let sit, undisturbed for 8-24 hours. You can check on the temperature of the cooler after eight hours and add more hot water if desired. I usually incubate mine for at least 12 hours and don’t reheat the water.
So, that is how I am making our weekly batch of yogurt right now. But let me tell you, I am not finished with raw milk yogurt yet. I got a tip from a savvy home cook last week and will be trying it again.
How are you making yogurt for your family?


It’s funny that you posted this today, because I was just reading your older post about making yogurt on Saturday. I ended up following the instructions in Nourishing Traditions to the letter… and I ended up with mucous-y milk with a yogurt-y smell. I didn’t think it would progress at all, so I decided to try to make cream cheese and whey with it (can’t let that precious milk go to waste!!) But the yogurt was too runny to collect any solids in the towel. So I decided to treat it like it was milk. Nourishing Traditions says to leave milk out for 1 to 4 days until it separates for making cream cheese. So I put it in the top of my pantry with the light left on. It’s about 10* higher than room temperature up there. I took it down and took the lid off this morning, and I was very surprised to find that it smelled like yogurt, and was thickening up too! I’ll probably still use it for cream cheese, but I didn’t expect it to become more yogurt like in the process!!
I wonder if you have had any experience with slimy yogurt? During my fifth attempt at home-made yogurtlast weekend, I usedwith barely pasturized grass-fed milk, and everything was going wonderfully until I pulled it out of the fridge (first it incubated for 6 hours), and it was slimy! I’ve had super runny yogurt, yogurt that curdles at the bottom and now slimy yogurt. I’m about to give up, I feel like I”ve wasted so much milk on this “money saving” task!
Rebekah – Oh yes, I am all too familiar with snotty yogurt. I thought I had read somewhere that it is the product of not heating the yogurt high enough. How are you doing it?
This is timely. We are planning to buy an ice cream maker with our swagbucks (well, amazon gift cards from swagbucks 🙂 ) and I thought it would be nice to make frozen yogurt since we can’t get raw milk here and making store milk into yogurt should be healthier. I used to get a lot of snotty yogurt so it’s good to know why it happens. This method sounds like a good way to make it 🙂
I use a culture that needs to just sit on the counter for 12 – 16 hours…no heating, no yogurt maker. Just dump the milk in a canning jar with a little yogurt and you are good to go. I got the culture from Cultures for Health (the Viili starter). It is a bit runny, but we don’t mind and it’s very mild tasting, perfect for topping with granola or fruit. For the ease of the process, I can put up with my yogurt being a bit runny.
Making yogurt with our raw milk has been the bane of my kitchen existence lately. We have done the cooler method and had smelly, runny results (very NON-yogurty, let me tell you). The crockpot method from your blog gets closer (though it is usually very liquidy no matter what I do). So, I keep using my icky milky product to soak our oatmeal so that it doesn’t go to waste, but I continue to have to buy three or four quarts of yogurt every week. So, I would LOVE to know if your new hint about making yogurt with raw milk works out because I am starting to get a complex that I am incapable of making my own yogurt!
A couple of weeks ago we made yoghurt for the first time using the Nourishing Traditions recipe for raw milk yoghurt, which deviates slightly – with raw milk, its heated to only 110F, not 180F, adding one tblspn starter while heating, then pour into a mason jar and add another one or two tblspns of starter. We then put the jar in the dehydrator at 95F for 8 hours, then stir, and into the fridge – yumm 🙂 (BTW – we had taken about a quart of cream off the top of the gallon to make butter before making the yoghurt, so it wasn’t as thick and creamy as it could have been)
Pax et bonum
I make our yogurt in the oven instead of a cooler. Just turn the oven light on. I found the recipe at Keeper of the Home and, for me, it works just great. I tried the crock pot recipe and it didn’t work for me. I have found though that buying pasteurized milk, not ultra-pasteurized does make a difference. What I love about homemade yogurt is that a gallon of organic milk is cheaper than a gallon worth of non-organic yogurt.
I’ve been trying to make raw milk yogurt and am about to give up. I’ve made it on the counter like Jessica with so-so results, I’ve tried the cooler method – again, with so-so results. I incubated my last batch in the oven with the light on for 12 hours. The next morning it was nice and thick, great flavor, but that night, when my husband went for a bowl, it had separated. Now he just keeps stirring it up and “eating” it.
Why does it seem to be so hard to do with raw milk?
I do the “in the oven” technique, too. Last time I made yogurt, I used our raw milk, but heated it to just 140 degrees before I did a quick-cool to 110, and there was very little slime, but not so much that the yogurt wasn’t good. When I make mine, I do make the flavors as I am making the yogurt, saving one back as plain for starter for the next batch. Hubby has decided that he likes the maple syrup one best with my sprouted granola, and the honey-sweetened one best with his soaked oats. YUM!
Has anyone experimented with fruit-flavored yogurts from the milk stage? Our kids spend every other week at their mom’s house, and they seem to think Yoplait is how yogurt should be… So far, my attempts have had nothing but turned-up noses!
@Dani,
We home can our fruit. My son will eat my homemade yogurt like it is Yoplait (he gets it at his grammas) as long as I take the whole quart of peaches and process them in the blender. I then mix the peach goo in with the yogurt. As far as he is concerned, it looks enough like the store bought to be fine with him.
I make raw milk yogurt once to twice a week. I’ve certainly have had many failed attempts until a woman at my milk pick-up gave me a very helpful hint. Use mason jars that are very clean and have had no acidic ingredients in them. If they have, boil them to sanitize them and then designate them as your yogurt only jars.
One of the first posts I did on my blog was about making homemade raw milk yogurt. I need to update it a bit, but here are some of my own helpful hints. Oh, I should mention, my yogurt comes out almost as thick as the store bought stuff and is utterly delicious and creamy.
Some helpful to do’s for making raw yogurt:
1. Don’t heat your milk above 110 degrees. Anywhere from 100 – 110 is fine.
2. Place 5 mason pint jars in a pot filled with water to about a 1/2″ – 1/4″ from the jar rims.
3. Use a heaping tbsp. of fresh yogurt for each pint jar. Make sure to stir yogurt into the milk very, very well.
4. Keep your water in the pot between 100 – 110 degrees. If it get’s any hotter your yogurt will start to separate and become grainy. (I keep my pot of water on my “warmer” burner on low)
5. Keep your yogurt in the water bath for 8-10 hours.
6. Always use mason jars that are very clean and have had no acidic ingredients in them.
Hope this helps. I’ve had a lot of friends start making their own yogurt and have had great success too.
Here’s the link to the blog post I did in case you’re interested: http://artistta.blogspot.com/2010/01/yogurt-getting-back-to-tradition-with.html
I used to do it this way, and I have an incubator called a yogotherm which works great for this kind of yogurt. But between making yogurt, kefir, cheese, etc, I just don’t have the time every week to heat and cool milk to make yogurt, so like Jessica, I have been making counter top yogurt (Filmjölk) which although it is thinner is really delicious.
I’ve also been trying to make raw milk yogurt. I’ve done 3 batches and none of them worked. I tried the crockpot first and it was nasty. Then I tried the cooler and it didn’t work and then I tried only heating it to 110 and then putting it in the cooler. It was better but still not something I’d want to eat. I’m getting ready to try again. I’m hoping this time works.
I have a yogurt machine that was given to me many many Christmases ago and without fail I would have leftover milk/yogurt mixture after I fill the 8oz jars. I would give the leftover mix to my mom and she would do something with it. Recently I had so much leftover mix (my husband measured out the milk and forgot how much we usually need) that i decided to put it in a clean jar, wrap the jar with a towel, put it in my oven, turn the light on and leave it there overnight. The next morning I checked on the milk to see if it went bad or if nothing happened. Well, I ended up with yogurt! Since then I’ve been making yogurt in the machine and in a large jar that I wrap and put in the oven with the light on for at least 8 hours. Seems to work for me.
Great suggestions, everyone! I have my first batch in the dehydrator. We’ll see how it comes out. Fingers crossed!
Question… how long does a batch of homemade yogurt last? I am making mine from raw milk.
Thanks!,
Jen
I’m using a slightly different cooler method (we now affectionately refer to the cooler as our yogurt maker) that I got from Katie at Kitchen Stewardship. I love her method as there are virtually no dishes and its impossible to scald the milk. Which is great because I’m usually baking sourdough bread and homeschooling at the same time! I’ve found that I’ve had the best results with using plain, whole milk Dannon yogurt as my starter (when I can’t reuse some from the previous batch) and waiting until the milk is almost down to 100 degrees before I stir the starter in. Super creamy!
I make mine exactly like yours except I incubate the yogurt in the oven with the pilot light on and the jars wrapped in blankets. I love forgetting about it for 5 hours and coming back to find thick, creamy yogurt!
Cooking and incubating in proper temperatures is just far too time consuming for me and I didn’t ever like the results. So a friend recommended a room-temperature starter and I’ve never been so pleased! We get it from Cultures for Health and it is the Matsoni. For a long time I made it with 1/2 and 1/2 and it turned out so thick and creamy! We used it in place of sour cream for everything. Whole milk produces only a slightly less thick yogurt. Love it! SO simple!
Thanks for sharing! I always assumed it was difficult to make yogurt. However, it does not seem that hard after all.
http://faithfulsolutions.blogspot.com/
I used the oven method quite successfully for a long time, but I got a yogurt maker for Christmas. I bring my milk to a boil and boil for maybe 10 minutes (this obviously wouldn’t work for raw milk yogurt). I find that boiling it makes for a really creamy and thick finished product. I then cool it to 110 and follow the manufacturers instructions. Once in awhile, the bottom seems too “cooked”, and I am thinking of trying it with a thin towel layer under the jars to protect the yogurt from too high temperatures.
So enjoying following your new adventure/journey! Shortly after we got goats I invested in a yogurt maker & it does a great job. But I like learning about alternative ways that don’t use conventional power, so thanks for sharing this!
I have used the crockpot method and then my mom picked us up a yogurt maker (1 qt) at a thrift shop. It works well but the milk still has to be heated prior to putting it in the maker so I went to the method from Kitchen Stewardship of heating the milk in mason jars placed in a big pot of water. However, this summer (in SW OK), I decided to experiment with outdoor yogurt culturing and that worked out well and was SO simple. Obviously, not doable all year round but great for those super hot months when you hate to have to cook anything.
I may try this… I’ll have to keep up the temp for 24 hours since I’m on GAPS. My results with raw milk and Seven Stars Farm yogurt have been good. I recently started mixing in some low-temp past cream into my raw milk and that has helped. I’m going to try the low-temp past milk next (when I go back to dairy…) I just got to the point where I don’t expect my yogurt to be like commercial yogurt – I’m okay with it being a little runny. I now drink it!!
I’m surprised that you heat yours to 180. I know that’s the standard way, but to keep it raw and make it even easier just heat to 110. Also I’ve had batches that don’t thicken. I thought I could try to re-heat and re-inoculate and when I heated it again it curdled…so I drained it in cheese cloth and it was awesome tangy raw cheese, and still raw cultured whey. One of my better mistakes 🙂
XO
Hello, I have been making yogurt with this method several months now, and today when I heated the milk the skim on the top was very yellow, much more so than has ever happened before. I’ve been using the same grass fed milk each time. Could the milk have been slightly bad? And would it be OK to eat? Milk smelled absolutely fine, But thinking back the milk solids on top when I poured the milk initially did look a little different than normal…Maybe a little curdled?